What drives you? Chain and sprocket considerations:
The first few laps of practice at a track are for familiarization and information gathering. You take mental notes, perhaps log some data and maybe even shoot some video to help determine brake markers, shift and turn-in points, safe passing zones, potential hazards, and which way the track goes past any blind rises.
Once you’ve figured out the basic line and track flow and started dropping your lap times, the next step is to refine the picture by adjusting gearing choices. The two things you'll need to consider for determining the proper gearing are mid-corner rpm and straightaway rpm. Your drive out of corners depends on your ability to keep the motor on the boil at the top part of the rev range. However, you also want to avoid running out of acceleration by hitting the rev-limiter on key straightaways as well as any short chutes between turns.

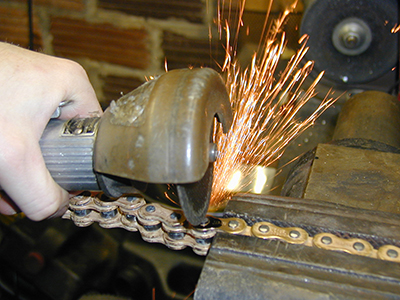
This would not be a good moment for an errant chain. Blair Hartsfield Photography
If we were running GP bikes, we would adjust the internal gear ratios in the transmission to fine-tune each gear for the decisive locations on the track and ensure job security for Tim, but we race BMWs which leaves us with swapping final drive ratios as our only option. Without the ability to change internal gear ratios, selecting the optimal final drive ratio requires some compromise between drive out of a corner or two, the speed attained on the chutes, and top speed on the main straight. Choosing final drive ratios can be further complicated by planning for expected faster lap times and the effect that running in other bikes' draft might have on achievable top speed.
Determining which way to go with gearing can be tricky if you rely solely on a rider's impressions and input since this can be influenced by traffic in practice, a bad lap, any number of things. This is where a data logger that captures lap times, engine speed, and front wheel speed can be very helpful. The data do not lie, and we can decipher the data traces to come up with an accurate picture of the track layout and rpm range in each corner and on the straights, and use that to guide both gearing choices and shift points.
We gear the bike for acceleration out of key corners that help the most with lap times while still allowing for acceleration on a straight. Usually a fast corners leading onto a straightaway are more important, for example, than a slow second-gear corner exit that leads into another slow turn.
Streetbikes come stock with gearing that is heavy and impractically tall. We swap out the stock steel rear sprockets for aluminum ones in 520 pitch, the stock front sprocket for a steel 520 pitch, and the chain for a 520 o-ring type. The chain we use is one of the more expensive ones, but the frugal man pays in the end. On our 600s the chain would last a whole four weekends of endurance racing without complaint, and then right on cue it stretches like taffy. The 1000s get a new chain virtually ever race. Race chains have a master link with the press-fit side plate and expanding rivets. You can still buy chains with clip-type master links but before you do, imagine the moment that your chain gleefully flings itself free of your sprockets on some random trajectory and your bike suddenly becomes a heavy, environmentally unsound pushbike. Get the rivet link and related tools.
We used to carry a crate full of 44, 45, and 46 tooth rear sprockets, and 14, 15 and 16 tooth front sprockets. We had to add some smaller rear sprockets to the crate for the BMW S1000RR so now we are haul around down to 39. We’ve used AFAM, Renthal, Vortex and Sprocket Specialists sprockets over the years on various Suzuki and Yamaha models but for the last six years we have been exclusively using Thrust gearing from moto-heaven.com.
When deciding which direction to go with your gearing, a difference of one tooth on the front sprocket typically equals about a 1,000 RPM change in sixth gear. For example, swapping from a 15 tooth front to a 16 tooth front will bring the RPM from 13,000 rpm to 12,000 rpm at a given speed or, if horsepower, wind resistance, track length and rider disposition are all favorable, allow the motorcycle to attain a higher speed at the same 13,000 RPM. Rear sprockets are about 300 RPM per tooth and go the other way. For example, a 46 tooth rear will bring the RPM up to 13,000 from 12,700 attained with a 45 tooth rear. However, the 300/1000 rpm Kentucky windage rules of gearing selection increase as you go down through the gear box. One tooth off the back will be a small change in sixth gear, but possibly a larger change in second gear.
Shorter gearing (smaller fronts and larger rears) make the bike accelerate faster, while taller gearing (larger fronts and smaller rears) give the bike a faster top speed or more room between shifts. With the sprockets we carry we can go from a short of 14/46 to a tall of 16/44 (gear ratios from 3.29 to 2.75). We have yet to find a track outside of those extremes. We can also fit all of that gearing with a stock length chain so we are not messing too much with wheelbase changes.
To calculate gear ratios, you divide the number of teeth on the rear sprocket by the number of teeth on the front sprocket. Once you have decided on your ideal ratio, you may find that you can achieve that ratio a few different ways. For example: a 15/47 combination gives you a ratio of 3.13, which is about the same as 14/44. So which one should you choose? Assuming you make no changes to the number of links in the chain, the 14/44 combination will give you a longer wheelbase, which will make the bike more stable on the straights and give it less of a tendency to wheelie. The 15/47 combo gives you a shorter wheelbase and your bike will turn quicker. The track layout and dominant characteristics should guide your decision of whether the situation calls for a more nimble or more stable bike.
On the endurance bike things are further complicated by the need to be able to change rear wheels rapidly. A smaller rear sprocket makes it easier to get the chain off when we are in a hurry so, with the BMWs, we are often running, for example, 15/40 where, in the past, we might have run 16/43 on the R1.
Chain and master link installation:
It used to be that most chains were held together with a convenient hand assembled clip-type master link. At least, it was convenient until the clip came off after a few laps, setting the chain free to break the water pump, clutch pushrod and anything else in its way. Fortunately those dark days are behind us and master links that require massive force and determination to install are available. Following is a socially conscious pictorial essay about cutting a chain to length and properly assembling a rivet master link. Installing a chain is one of those activities best left for a time when there are few distractions. Make peace with the world and yourself, and begin.

With the rear wheel about midway through its travel in the swingarm slots,
wrap your chain around your sprockets to gauge how long your chain
needs to be. Count the number of links you want to take off (if any).
Count again. Maybe again. Alternatively, lay out your new chain next to
the old chain and identify where you need to cut, but remember that your
old chain may have stretched so you’ll need to allow for that difference
when surveying for your target. Mark the rivet. Make sure you will be left
with a link that a master link can go into. Never end a sentence in a
preposition, undersized chains are a situation up with which we shall not put.
New chains come with the rivets staked or peened over so they won’t fall
out. To push one out with a rivet remover you should grind the offending
rivet flush to not strain the rivet presser too much or it can bend. The
machine that peens all those rivets must be quite a thing.

So you end up with something that looks like this.

Use some sort of rivet press to drive the rivet out.

You’ll hook the ends of the new chain together with a rivet-type master link.
The ends of the rivets are expanded over a press-fit side plate, making for
a safe solution. Proper assembly is important, of course, as we learned one
year at a 24-hour race when an improperly installed rivet flung free from its
chain. The resulting CRACK! as the chain whipped up to bend the subframe
before tightly curling itself around the countershaft sprocket, breaking all
the sprocket cover mounts off the case in the process, was enough to stop
the hearts of the pit crew standing at hot pit lane. Not to mention the rider,
who was thankful the subframe was there to stop the chain from hitting
something more vulnerable, like a leg.

Don't let this happen to you!

Thread the chain over the front and rear sprockets on the motorcycle,
and get the master link ready by rounding up the o-rings and gacking
them up with the lube that should have accompanied the new rivet link.

Hook the chain together with the master link.


Put the remaining two o-rings on the master link rivets and start the
side plate on as best you can with your fingers.

Partially press the plate on by squeezing the plate onto the rivets with
pliers or vise grips. Alternate between rivets to get the plate on evenly.
Eventually the rivets will be flush with the side plate. Next find the tool
to push the side plate on the rest of the way.

The RK rivet tool comes with two plates for pressing on chain side plates.
One plate has a deeper groove and is designed for use with a clip-type
master link. The other plate is for pressing the side plate onto a rivet-type
master link. The rivets will be exposed enough to squash out so the side
plate can’t come off.

Drive the sideplate on until the groove in the tool plate bottoms out on
the head of the rivets. The link should move freely.


Remove the tool and replace the plate with the conical rivet expander.
Drive the nose of the expander into the indentation in the end of the
master link rivet to spread it out such that the sideplate can’t come off.


Measure the outside diameter before and after grinking the expander into
the rivet. Usually about .4mm of change will ensure that the rivets have
expanded sufficiently to keep the side plate from coming off. If you try
to expand it any more than that you can crack the end of the rivet, and
would you trust a chain with a cracked rivet for 6 solid hours at almost
200 horsepower?

One down, one to go.
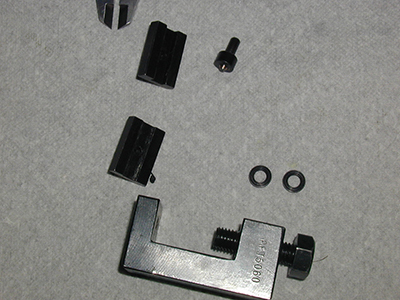
Front sprocket installation:

Beware the output shaft locknut. If the bike doesn’t come with something
like this Yamaha output shaft lock washer we recommend adding one.
This stock R6 part also fits the GSXRs.

Brunhilde currently has her countershaft retained with a nut, a fold up
washer (in shadow) and safety wire.
Tightening the nut with a torque wrench is nerve wracking, as it is difficult to keep the rear wheel from rotating without jamming something in the spokes. We usually end up just zapping the nut on with an airgun and hope for the best. Put the bike in gear, engage the rear brake, and take up the slack in the chain by putting your foot on top of the chain when you whack the nut on with the airgun. Otherwise the airgun just makes the chain bounce up and down and less force goes into tightening. If your countershaft sprocket nut includes a bendable lock washer, bend the lock washer against the nut as shown above. If you don’t have a bendable lock washer (or really, even if you do), try to find a way to safety wire the nut to the sprocket.
Chain adjustment:
Ideally the rear wheel should be parallel to the front wheel. Use a caliper to measure from the back of the chain adjuster block that the axle goes through to the back of the swingarm, which we feel is better than just eyeballing the adjustment against the stock swingarm lines.
Make sure that there is enough slack in the chain. Most manuals recommend 25-35mm of chain slack, measured at the mid point of the chain under the swingarm. We usually err towards the higher end of the slack scale. If your chain is not new, rotate the rear wheel through the full range of the chain and set the slack at the tightest point on the chain. If you have too much range from tight spot to loose spot on your chain, it's usually due to one of two reasons: 1) your chain is worn unevenly and should be replaced, or 2) your rear sprocket is not concentric (i.e. the center hole is not in the center) and should be replaced.
Once you have your static chain slack set, make sure there is some slack while there is a rider sitting on the bike. We typically err on the loose side rather than the tight side with chains. A too tight chain will restrict suspension movement, and, if that occurs, potentially overload the transmission output bearing.

Tim lays out the tools of the trade as he prepares to practice his
chain-changing craft at the track. After carefully following the chain
installation procedure outlined in this article Tim realized he had just
changed the chain on the “B” bike instead of the “A” bike, which had
the worn out chain on it. Photo by AOD MOI.

Chris Peris trying his best to undue Tim's press fit
master link. Blair Hartsfield Photography
